Templot Club Archive 2007-2020
|
|||
| author | remove search highlighting | ||
|---|---|---|---|
|
posted: 18 Jan 2016 16:17 from: John Lee
click the date to link to this post click member name to view archived images |
I am attempting to import a scan of a proposed layout into Templot 2 so as to be able to draw up the track templates. I have been able to save a scan in bmp format which I believe is the first step - it has been scanned at 300dpi and is drawn to a scale of 1" to 1'-0"; but I cannot find any information as to how this can be loaded onto the sketchpad. The baseboard size is overall 99" x 24" and is in 3 sections, and from left to right comprises a traverser 14.5" wide, and 2 boards 40" wide and 44.5". The scan is for a layout 6' - 6" x 1' 9" and I intend to extend it to fit the available space and I am working in P4 gauge. Can anybody out there tell me in very simple terms how this could be done - I normally work with Apple Mac computers and am not all conversant with PCs. I have a small laptop PC bought for this job but I find it very difficult to adjust to PC working. Any help would be greatly appreciated. A copy of the scan is appended below. Many thanks John L 3062_181112_060000000.jpg 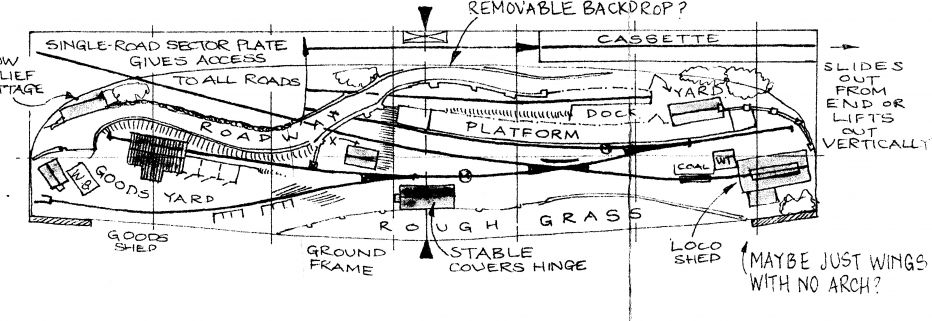 |
||
|
posted: 18 Jan 2016 16:47 from: Martin Wynne
click the date to link to this post click member name to view archived images |
Hi John, Welcome to Templot Club. You don't need a BMP file (that is from older versions of Templot). Nowadays all the common image formats work -- usually JPG for a scan. But you can still use the BMP file. Don't use the sketchboard. You can add images that way, but for what you want it is better to use a picture shape. N.B. Don't start this until you have made your S4/P4 gauge setting. Click this menu item: 2_181130_080000000.png 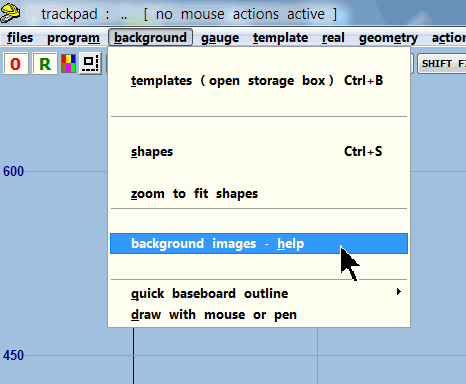 which leads to: 2_131128_200000001.png 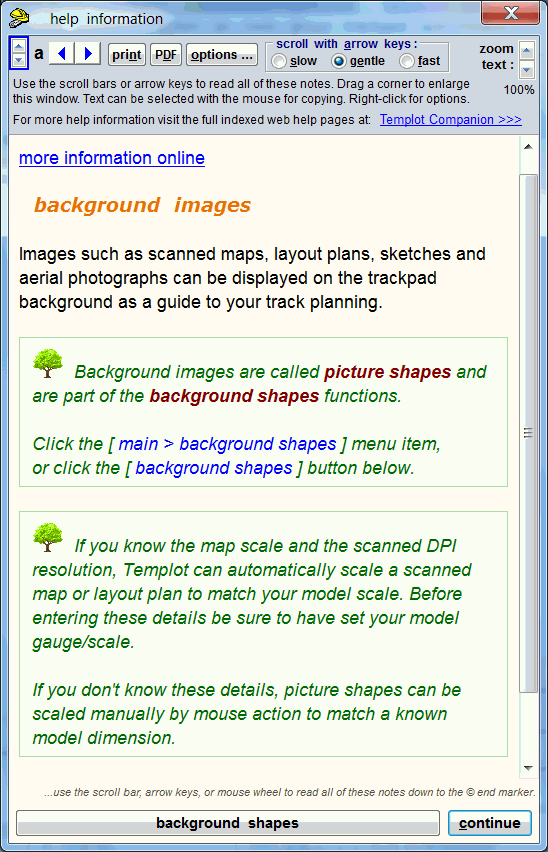 Click background shapes at the bottom. Which leads to: 2_181137_580000000.png 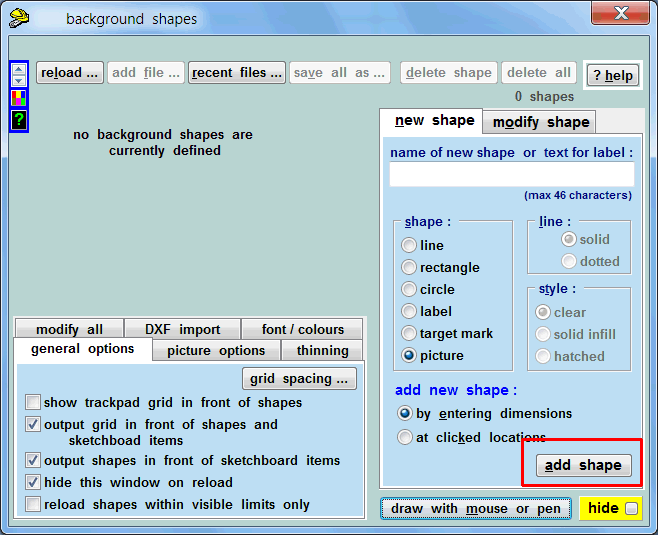 Click the add shape button. Which leads to: 2_181141_330000000.png 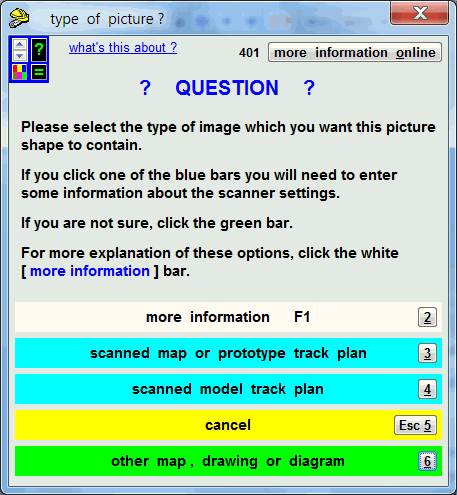 Click whichever answer is appropriate, probably the second blue bar as you know the scanned dpi, and follow the instructions. At 1 inch = 1ft, enter the model track plan scale ratio as 12. N.B. if you click the blue bars, make sure you have set your required gauge and scale before doing any of this. Templot will do the rest. After the image is on the trackpad, you can move it around as required, using this mouse action: 2_181202_140000000.png 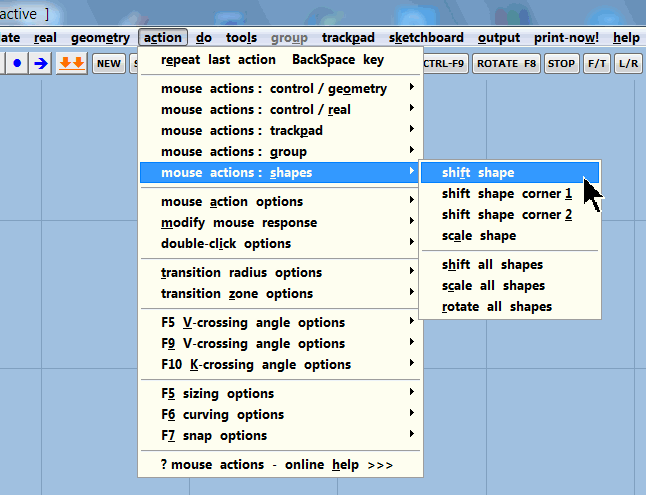 Ask again if you get stuck. regards, Martin. |
||
|
posted: 18 Jan 2016 18:21 from: John Lee
click the date to link to this post click member name to view archived images |
Martin Thanks for your quick reply - I have got as far as background shapes and ticked modify shape, picture and then add shape. Type of picture panel appears and clicked 2nd blue line 'scanned model track plan'. New panel appears entitled enter data for background picture shape. What do I do now please? Sorry to appear dim. Regards John |
||
|
posted: 18 Jan 2016 18:48 from: Martin Wynne
click the date to link to this post click member name to view archived images |
Hi John, Accept or edit each line of data. Click the enter button or press the ENTER key on the keyboard once for each line. Click the ? info button on each line for some notes about each item. For your data, change the 24 to 12 for your 1inch=1foot track plan. Finally the enter button will change to OK. Click it again: 2_181327_460000000.png 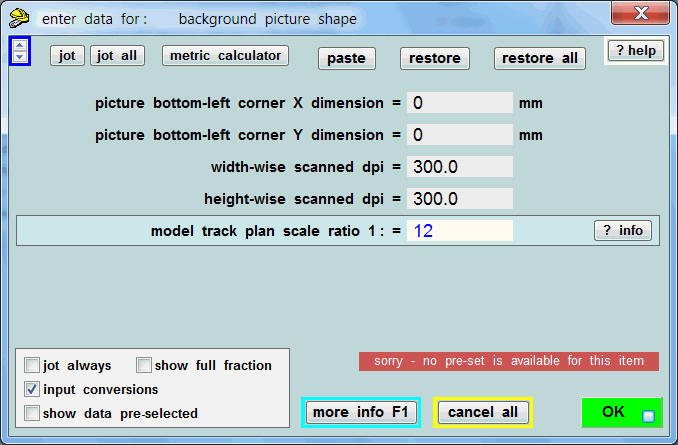 After which the Windows file dialog will appear. You then need to navigate to wherever you saved the image file and select it. Alternatively, if you previously copied the image in your image editor program, you will be able to paste it directly without needing to find the file. p.s. working over a scanned image can make it difficult to see what you are doing. You can switch it on and off by pressing SHIFT+HOME keys. I also strongly recommend that you learn to use Templot on trial track plans, before trying to copy a published plan -- which can be tricky and needs a full knowledge of all the options in Templot to make things fit. more p.s. if you find Windows difficult to use, Templot works quite well on a Mac computer (modern type) using Codeweavers CrossOver, see: message 19789 message 19798 regards, Martin. |
||
|
posted: 22 Jan 2016 11:58 from: John Lee
click the date to link to this post click member name to view archived images |
Thanks Martin I have now been able to import the scan as desired. Regards John |
||
|
posted: 24 Jan 2016 16:04 from: John Lee
click the date to link to this post click member name to view archived images |
Martin Some more questions for you. Having got the background scan sorted out I can place the usual track template (curved track with turnout in) and have adjusted it to suit. If I want another template e.g. plain track where do I get this from, I have selected plain track from the Template panel but on pasting it on the plan the original section of track disappears and I am just left with the new selection. How does one save what you have done and do you have to do this every time you add some additional trackage to your plan? Sorry to appear dim but I can't seem to get any further. Regards John |
||
|
posted: 24 Jan 2016 17:27 from: Martin Wynne
click the date to link to this post click member name to view archived images |
John Lee wrote:Sorry to appear dim but I can't seem to get any further.Hi John, To answer your specific question, you can press the INSERT key on the keyboard before moving to the next template, or click the top tool-button which has two orange down arrows. But most of the time there is no need to do that because all of the tools > make... functions do that for you. If you have finished work on your first template it is extremely likely that your next operation would be to click one of those functions. The NEW tool-button is primarily for use when you want to create and print individual templates, rather than when designing a track plan. You need to read the docs and watch some of the videos. Please read the download page at: http://templot.com/downloads/download.htm With the best will in the world, I can't write a complete Templot manual as a reply here. I'm very sorry that great swathes of the docs, and many videos, are out of date and waiting for me to update them. That's why Templot is free to use. As a starting point you may wish to watch this video: http://templot.com/martweb/videos/flash/starter/em_starter.html (Note that the F10 swell function in the video is now on CTRL+F10.) And then you could read these pages: http://templot.com/companion/index.html?gs_firstoff.htm http://templot.com/martweb/gs_whatis.htm http://templot.com/companion/index.html?gs_baffled.htm For a list of docs and their current state, see: message 19146 regards, Martin. |
||
| Please read this important note about copyright: Unless stated otherwise, all the files submitted to this web site are copyright and the property of the respective contributor. You are welcome to use them for your own personal non-commercial purposes, and in your messages on this web site. If you want to publish any of this material elsewhere or use it commercially, you must first obtain the owner's permission to do so. |